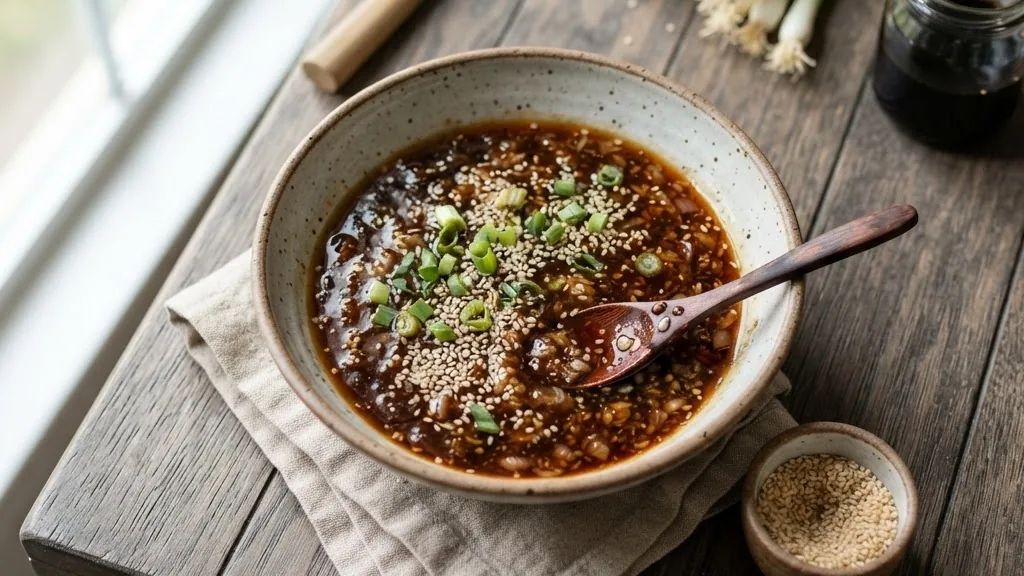
Homemade teriyaki sauce starts with a truth most recipe sites skip: teriyaki is a cooking method, not a condiment. The word joins teri (照り), meaning luster or shine, with yaki (焼き), meaning grill or broil, per Wikipedia and the New World Encyclopedia. The glossy glaze you brush onto salmon is the point; the sauce is only the vehicle. Get that distinction right and everything else, from consistency to storage, falls into place. Below you get the sourced origin story, the traditional three-ingredient formula, and the food-safety and troubleshooting detail that the popular recipe pages leave out.
Quick answer: Homemade teriyaki sauce in its authentic form is a reduction of just three ingredients: soy sauce, mirin (or sake), and sugar, boiled until it coats the back of a spoon. Kikkoman traces the technique to Edo-period Japan, where it glazed fatty fish. Americanized versions add ginger, garlic, and a cornstarch slurry for speed. One base gives you three tools: a thin pour-over sauce, a marinade, and a thick glaze. Leading scratch recipes run 7 to 15 minutes and yield about 1 to 1 1/4 cups per batch.
What Teriyaki Actually Is: Technique Before Sauce
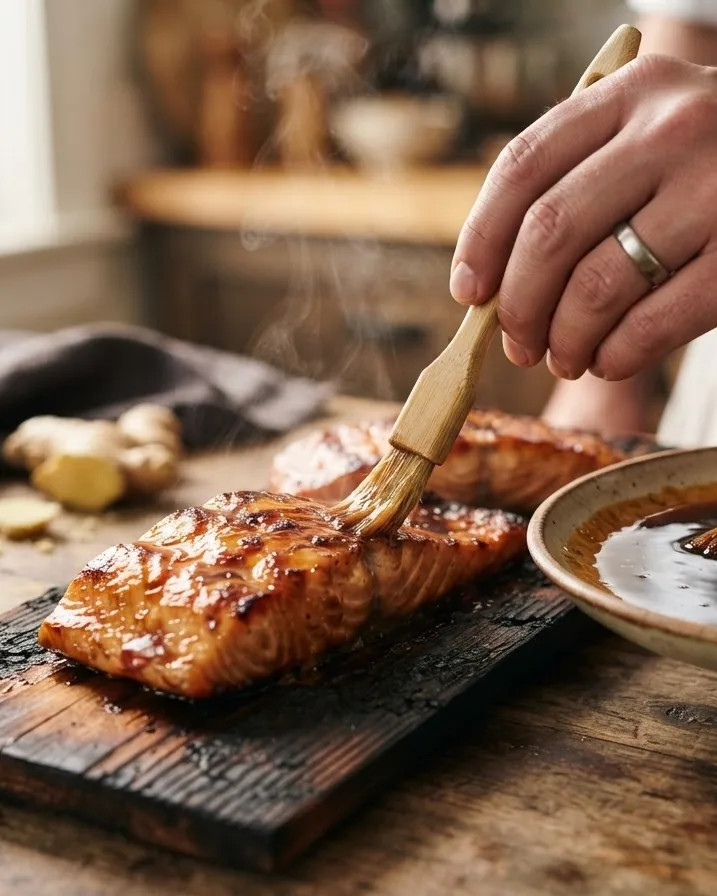
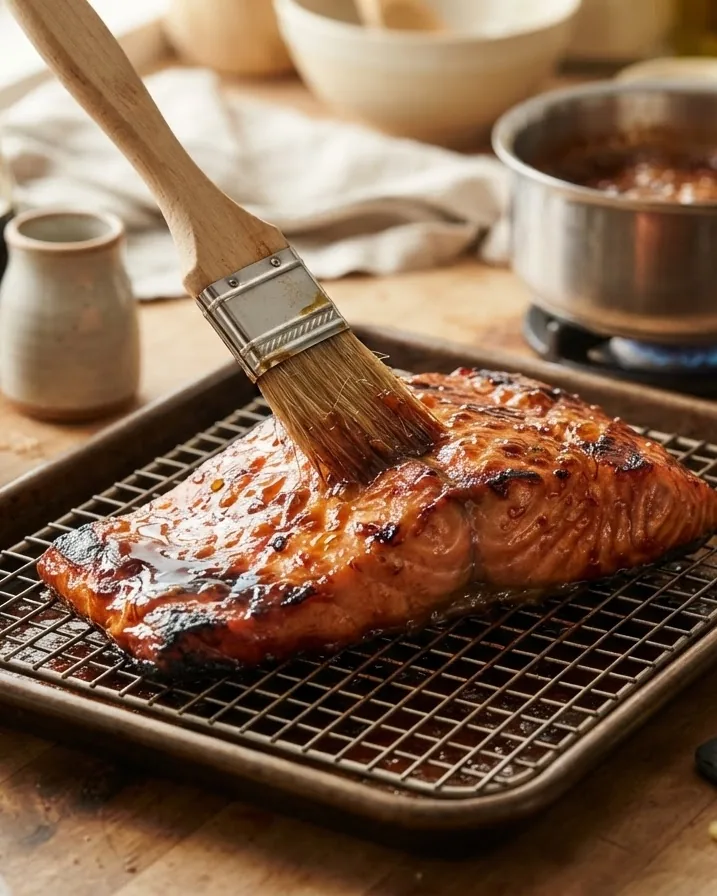
Teriyaki is a grilling or broiling technique in which food is cooked while being glazed with a sweet soy-based sauce, producing the shine that gives the dish its name. The etymology makes it plain: teri (照り) is luster or shine, and yaki (焼き) is grill or broil, a definition corroborated by Wikipedia and the New World Encyclopedia. That is why a bottle labeled teriyaki is slightly misleading. The authentic idea is the lacquered surface you build on the protein, coat after coat, not a liquid you dump from a jar.
This matters for how you cook. A traditional glaze thickens on the fish, not in the pan. The three popular recipe pages treat teriyaki as a finished pourable liquid, which works for weeknight bowls but loses the original meaning.
Once you think in terms of glaze rather than gravy, you make smarter choices about reduction, timing, and when to brush. If you enjoy building flavor from scratch, the same instinct that produces a good fiery homemade Schezwan sauce applies here: control the base, then decide its final form.
Etymology and Edo-Period Origins: The Sourced History
The teriyaki technique emerged in Japan during the 17th century, in the Edo period spanning 1603 to 1868, according to Kikkoman, Saveur, and other historical accounts. Cooks used a sweet soy glaze to both flavor and preserve fatty fish such as yellowtail, salmon, and mackerel, since sugar and salt slowed spoilage before refrigeration. The name itself records the goal: build a glossy, caramelized skin (teri) on grilled or broiled food (yaki). That preservation-and-shine purpose explains why the classic formula leans sweet and salty rather than garlicky.
The three most-visited recipe pages for this dish handle history poorly. Two skip it entirely, and Plays Well With Butter offers a warm but personal family anecdote rather than a sourced timeline.
Knowing the fish-glaze origin also tells you where teriyaki shines today: oily proteins. Salmon, mackerel, chicken thighs, and beef take the caramelized coat beautifully. Leaner cuts need the sauce to carry more of the moisture, which is where a slightly thinner pour helps.
How Hawaii and America Reshaped It
Kikkoman launched the first bottled teriyaki sauce in the United States in 1961, and Japanese immigrants in Hawaii adapted the formula through the 1960s by folding in pineapple juice, fresh ginger, and brown sugar. That Hawaiian branch is why so many American recipes now include garlic, ginger, and a thickener that never appeared in the original three-ingredient reduction. Neither version is wrong. They are two lineages: the Edo-period glaze and the mid-century American plate-lunch sauce.
The Traditional 3-Ingredient Tare and Why Each Matters
Authentic teriyaki tare uses only three ingredients: soy sauce, mirin (or sake), and sugar, boiled and reduced until glossy, as documented by Wikipedia and TasteAtlas. Each has a job. Soy sauce brings salt and umami. Sugar drives caramelization and the reflective gloss. Mirin, a sweet Japanese rice wine with roughly 14 percent alcohol, contributes both shine and sweetness while its alcohol cooks off; it carries lower alcohol and higher sugar than sake, which is why the mirin-plus-sugar caramelization is what gives the sauce its lacquer. Strip any one out and the balance collapses.
Here is the logic behind the core components:
- Soy sauce: the salt and savory backbone. Low-sodium soy lets you control the finish without going flat.
- Mirin or sake plus sugar: the shine engine. Alcohol evaporates during the boil, leaving sweetness and a glossy body.
- Sugar: caramelization and gloss; brown sugar adds a molasses depth favored in Hawaiian-style versions.
The Americanized additions of ginger and garlic are flavor, not structure. You can leave them out and still have real teriyaki. Add them and you tilt toward the plate-lunch style. For a broader look at how a handful of pantry staples build a complex condiment, the same principle drives a good fresh homemade tomato ketchup, where reduction and sugar do the heavy lifting.
Substitutions: No Mirin, Gluten-Free, Low-Sodium
Swap ingredients in homemade teriyaki sauce without breaking it by matching each substitution to the role it fills. No mirin on hand? Use sake or dry sherry plus a little extra sugar, since mirin is essentially a sweeter, lower-alcohol rice wine at around 14 percent alcohol. Need gluten-free? Replace soy sauce with tamari or a certified gluten-free soy sauce, one-for-one. Watching salt? Start with low-sodium soy and adjust at the end. Cutting sugar? Reduce it gradually, tasting, because sugar also builds the gloss.
Quick swap reference:
- No mirin: sake or dry sherry plus sugar to restore sweetness.
- Gluten-free: tamari or GF soy sauce, one-for-one.
- Lower sodium: low-sodium soy, then season at the finish.
- Less sugar: cut in small steps; expect slightly less shine.
The two most popular scratch recipes lean hard on low-sodium soy but stop there, offering little substitution science beyond that single lever. If you want a deeper sub playbook for savory sauces generally, the tradeoffs mapped in a Worcestershire sauce replacement guide translate well to teriyaki: match the umami, the acid, and the sweetness in that order.
Reduce vs Slurry: Two Roads to Thickness
There are two ways to thicken homemade teriyaki sauce, and choosing correctly prevents the most common failure. The traditional road is reduction: simmer soy, mirin, and sugar until the water boils off and the syrup coats the back of a spoon. The fast road is a cornstarch slurry, mixing cornstarch with cold water and stirring it into the simmering sauce. Reduction gives a clear, glossy, deeply flavored glaze. A slurry thickens in seconds but clouds easily and can turn pasty if you overdo the starch.
The Modern Proper recipe runs a 7-minute cook using cornstarch, and a top comment on that page complains the sauce came out “like milk tea,” which is the classic slurry overshoot.
Rules that keep a slurry clean:
- Mix cornstarch into cold water first, never dump dry starch into hot liquid.
- Add the slurry to an active simmer and cook one to two minutes so the starch loses its raw look.
- Use the smallest amount that hits your target; more starch means more cloud.
Remember that any teriyaki thickens further as it cools, so pull it from the heat while it is slightly looser than you want. Plays Well With Butter runs a 15-minute cook and leans on reduction for its drizzle-versus-glaze control, which is the more forgiving method for beginners chasing shine.
One Base, Three Consistencies: Sauce, Marinade, Glaze
The smartest move with homemade teriyaki sauce is to build one base and split it into three tools by controlling thickness. A thin, barely-reduced version becomes a pour-over sauce for rice bowls and stir-fries. The same base, unthickened and still fluid, works as a marinade that clings to raw protein. Reduce it further, or add a light slurry, and it becomes a thick brushing glaze for the grill or broiler. The cue for the glaze stage is the classic one: it coats the back of a spoon and leaves a clean line when you swipe a finger through it.
Consistency map from a single batch:
- Thin sauce: minimal reduction, pourable; for bowls, noodles, and stir-fry.
- Marinade: fluid and salty; coats raw chicken, beef, salmon, or tofu.
- Thick glaze: reduced or lightly thickened; brush during grilling or broiling.
This one-base approach is exactly what lets teriyaki carry a whole dinner. Brush the glaze on thighs and finish them fast, as in this crispy air fryer teriyaki chicken, or thin the base for a weeknight bowl. High-protein eaters can build entire meal-prep menus around it; a scan of these high-protein recipes shows how a single glaze stretches across chicken, beef, and tofu without extra work.
Marinade Food Safety: What USDA and FDA Require
Never reuse a marinade that touched raw meat unless you first bring it to a rolling boil, a rule stated plainly by the Food and Drug Administration in its Safe Food Handling guidance. Raw poultry, beef, and seafood shed bacteria into the liquid, so brushing that same marinade on cooked food without boiling it invites cross-contamination. The USDA Food Safety and Inspection Service adds the specifics: a reused marinade must reach a boil at 212 degrees Fahrenheit, or at minimum 165 degrees Fahrenheit, to destroy bacteria, and you must marinate in the refrigerator rather than on the counter.
The safe move is to set aside a portion of fresh teriyaki before it ever meets raw protein, a habit the Academy of Nutrition and Dietetics recommends. That reserved sauce is your safe basting and finishing liquid.
Refrigeration windows matter too. FSIS says to refrigerate perishable foods within 2 hours, or within 1 hour when the ambient temperature is above 90 degrees Fahrenheit. Pair the glaze with correctly cooked protein: the USDA lists safe internal temperatures of 165 degrees Fahrenheit for poultry, 160 degrees Fahrenheit for ground beef, and 145 degrees Fahrenheit for whole beef, steak, and seafood.
None of the three leading recipe pages cite these bodies, even while instructing readers to marinate salmon and chicken. You can read the FDA rules directly in its Safe Food Handling guidance, and confirm cooking temperatures through the safe minimum internal temperature charts published on FoodSafety.gov. For a companion look at how long finished sauces and cooked dishes keep, this cook’s guide on how long homemade soup lasts in the fridge uses the same refrigeration logic.
Troubleshooting: Cloudy, Too Thin, Too Salty, Won’t Gloss
Most homemade teriyaki sauce failures trace to one of four causes, and each has a direct fix. Cloudy sauce almost always means too much cornstarch or dry starch dumped into hot liquid; that is the “milk tea” problem seen in real reader complaints. Too thin means you stopped reducing early or used too little starch. Too salty usually comes from full-sodium soy with too little sweet counterweight. A sauce that will not gloss is short on sugar or has not reduced enough to concentrate its sheen.
Fast diagnostics:
- Cloudy or pasty: too much starch. Next time reduce instead, or use a lighter slurry mixed into cold water first.
- Too thin: simmer longer to reduce, or add a small measured slurry and cook one to two minutes.
- Too salty: add a little sugar and a splash of water or mirin; next batch start with low-sodium soy.
- Won’t gloss: add sugar and keep reducing; the shine comes from concentrated sugar and mirin.
Keep one number in mind at all times: the sauce thickens as it cools. Judge doneness slightly loose. The same steady-hand approach that rescues a broken pepper sauce, like a fiery mango habanero sauce, works here: adjust one variable, taste, and let heat and time do the rest.
Storage, Yield, and the Sodium Reality
Homemade teriyaki sauce keeps well and scales cleanly, which makes it a strong batch-cook candidate. Leading scratch recipes cook in 7 to 15 minutes and yield about 1 to 1 1/4 cups per standard batch; The Modern Proper clocks 7 minutes, Plays Well With Butter runs 15 minutes, and The Daring Gourmet notes its version “makes about 1 1/4 cups.” Store the finished sauce in a sealed jar in the refrigerator, where popular recipes report roughly a two-week window, and freeze surplus in small portions for longer keeping. Scaling is linear, so double the recipe for meal prep without adjusting technique.
The real advantage over the jar is control. When you build the sauce yourself, you decide the salt load by choosing low-sodium soy and reducing added sugar, something a sealed bottle never allows.
Teriyaki also plays beyond Asian menus. The reduction-and-gloss idea shows up across the sauce world, whether you are chasing the sticky cling of a good chicken finish or the balance in a 4-ingredient homemade buffalo sauce. Cooks who love pairing glazes with pasta can borrow reduction timing from these pasta sauces, and the caramelization chemistry that makes teriyaki shine has more in common with brewing than you might expect, as the writeups on coffee science illustrate when they explain how sugars behave under heat. If you want a fuller weeknight blueprint, the layering discipline in this layered homemade lasagna recipe mirrors how teriyaki builds flavor in coats rather than all at once.
Frequently Asked Questions
What can I use instead of mirin in teriyaki?
Use sake or dry sherry plus a little extra sugar. Mirin is a sweet Japanese rice wine at roughly 14 percent alcohol, carrying more sugar and less alcohol than sake, so adding sugar to a drier wine restores the sweetness and shine. The alcohol cooks off during the boil, leaving the glossy, caramelized body that defines an authentic glaze.
Is homemade teriyaki sauce gluten-free?
Not by default, because standard soy sauce contains wheat. Swap in tamari or a certified gluten-free soy sauce one-for-one, and the rest of the recipe stays the same. Since traditional tare is only soy, mirin, and sugar, that single substitution makes the whole sauce gluten-free without changing the technique, cook time, or final consistency at all.
Can I reuse teriyaki marinade after raw meat?
Only if you boil it first. The Food and Drug Administration warns against reusing marinades from raw food unless brought to a boil, and USDA FSIS specifies reaching 212 degrees Fahrenheit, or at least 165 degrees Fahrenheit, to kill bacteria. The safest habit is reserving fresh sauce for basting before the marinade ever touches raw protein.
Why did my teriyaki turn cloudy?
Too much cornstarch, or dry starch stirred straight into hot liquid, which is the “milk tea” look real cooks complain about. Mix cornstarch with cold water first, add it to an active simmer, and use the smallest amount needed. Better yet, reduce the sauce instead of using a slurry for a clear, glossy finish.
How long does homemade teriyaki sauce last?
Stored in a sealed jar in the refrigerator, popular scratch recipes report roughly a two-week window. Freeze extra in small portions for longer keeping. Always refrigerate promptly; USDA FSIS advises chilling perishable foods within 2 hours, or within 1 hour when the temperature is above 90 degrees Fahrenheit, to stay in the safe zone.
Is teriyaki sauce vegan?
The traditional three-ingredient tare of soy sauce, mirin, and sugar is plant-based, so a basic homemade teriyaki is vegan. Watch for two things: some sugars are processed with animal char, and Hawaiian-style versions may add honey. Choose vegan sugar and skip honey, and the sauce works for tofu, tempeh, and vegetable dishes without any change to technique.
The Takeaway
Treat teriyaki as a technique and the sauce becomes simple. Start with the traditional trio of soy, mirin, and sugar, reduce it for a clear glaze or thicken lightly with a careful slurry, and split one base into a sauce, a marinade, and a glaze. Respect the food-safety rules from the FDA and USDA FSIS, keep your starch light to avoid cloudiness, and remember the sauce firms up as it cools. That is how a homemade version beats the bottle on flavor, shine, and control.